--> andre krause.
quick'n dirty (meta) bitmap font tutorial
It takes quite a time to figure out how to find, modify and load a cool bitmap font for your opengl game/app.
so here are the steps you may follow:
(download bitmap_fonts_tutorial.zip [330kbyte] for offline reading)
part1: bitmap font without alpha-channel:
- 1. read the great nehe tutorial about bitmap fonts, Lesson 17.
- 2. find a cool truetype font, for example the great fonts on Hybrid-Space.
- 3. use the bitmap font builder from www.lmnopc.com
- 4. create a black&white bitmap font, open it in photoshop
- 5. in photoshop: choose from the menu "select/color range", and pick the white color of the font. set Fuzziness to 1, see image 1
- 6. copy the selection (edit/copy) and paste (edit/paste) it, delete the background layer.
- 7. choose menue "layer/layerstyle/drop shadow" and play around with the settings, see image 2
- 8. finally, save the image as jpeg, with a black background matte and use it like in Lesson 17.
now you may notice that using this font with glBlendFunc(GL_SRC_ALPHA,GL_ONE) in your opengl application is neat, but
not satisfactory because shadows and bevelation does not look as expected. this is because this font has no real alpha
channel, like you could store in tga - files. but creating this alpha channel needs some steps, as explained now:
part2: bitmap font with 8bit alpha-channel:
- 1. apply steps 1-7 from part1.
- 2. you now should have one layer with several effects, like in image 3.
- 3. now these effects need to be merged, so that we can extract the transparency information.
choose "select/all" and then "edit/copy_merged" the selection. then choose "edit/paste" and
realign the pasted layer so it matches the background (I don't know why this happens (i use photoshop 6.0).
now delete the old "layer1" (layer/delete_layer).
- 4. now select the transparency information from layer2. to do so, right klick on layer 2 and
choose "select layer transparency", see image 4.
- 5. now comes the critical part. klick on the "channels" tab and create a new channel (klick on
 ).
this will become our alpha-channel. now press control and right klick on this new channel the same time., image 5.
now we have the desired alpha-channel values :-) !!!
).
this will become our alpha-channel. now press control and right klick on this new channel the same time., image 5.
now we have the desired alpha-channel values :-) !!!
- 6. now you are free to save your great font as a 32-bit targa-file and load it into your opengl-app. remember to change the blending mode to glBlendFunc(GL_SRC_ALPHA,GL_ONE_MINUS_SRC_ALPHA).
- 9. concluding remark: if you want more sophisticated effects, have a look at the GREAT photoshop macros from scape, www.scapes.net
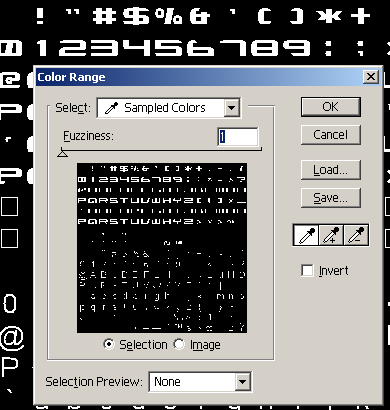
Image 1: make a selection with the "color range" tool
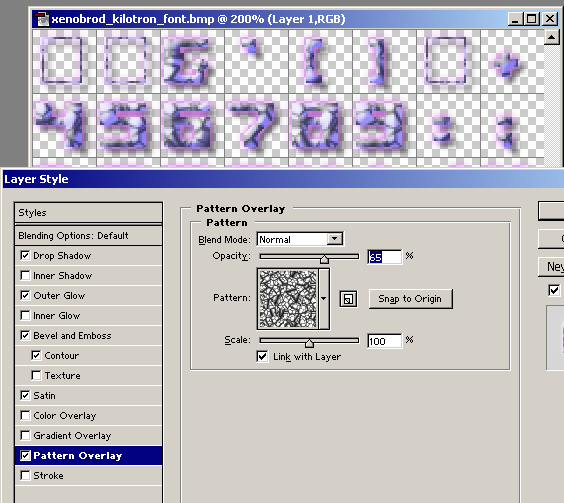
Image 2: drop shadows and let your font glow.
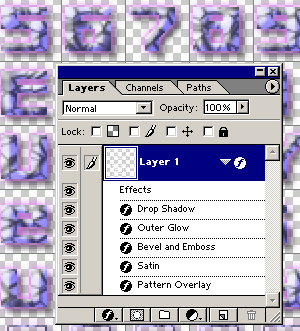
Image 3: one transparent layer with several effects.
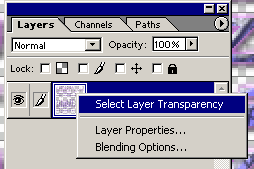
Image 4: select the transparency information from layer2.

Image 5: create a new channel (our alpha-channel) and press control-key+right-klick to create the alpha-channel values.
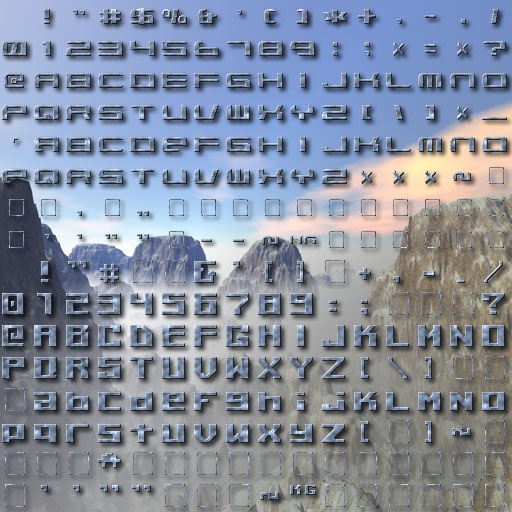
a resulting example font.
download some example_fonts.zip [500kbyte]
(they are not really good, just for testing purposes. remember too, that they are with alpha-channel! so you should change in the nehe lesson the blending mode to glBlendFunc(GL_SRC_ALPHA,GL_ONE_MINUS_SRC_ALPHA) )

download sample source code lesson17_alpha_fonts.zip [200kbyte]